A couple weeks ago I was playing around with a multiple architecture CI setup with another team, and that led me to pull out my StarFive VisionFive 2 SBC again to see where I could make it this time with an install.
I left off about a year ago when I succeeded in getting an older version of Debian on it, but attempts to get the tooling to install a more broadly supported version of U-Boot to the SPI flash were unsuccessful. Then I got pulled away to other things, effectively just bringing my VF2 around to events as a prop for my multiarch talks – which it did beautifully! I even had one conference attendee buy one to play with while sitting in the audience of my talk. Cool.
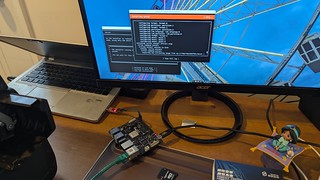
I was delighted to learn how much progress had been made since I last looked. Canonical has published more formalized documentation: Install Ubuntu on the StarFive VisionFive 2 in the place of what had been a rather cluttered wiki page. So I got all hooked up and began my latest attempt.
My first step was to grab the pre-installed server image. I got that installed, but struggled a little with persistence once I unplugged the USB UART adapter and rebooted. I then decided just to move forward with the Install U-Boot to the SPI flash instructions. I struggled a bit here for two reasons:
- The documentation today leads off with having you download the livecd, but you actually want the pre-installed server image to flash U-Boot, the livecd step doesn’t come until later. Admittedly, the instructions do say this, but I wasn’t reading carefully enough and was more focused on the steps.
- I couldn’t get the 24.10 pre-installed image to work for flashing U-Boot, but once I went back to the 24.04 pre-installed image it worked.
And then I had to fly across the country. We’re spending a couple weeks around spring break here at our vacation house in Philadelphia, but the good thing about SBCs is that they’re incredibly portable and I just tossed my gear into my backpack and brought it along.
Thanks to Emil Renner Berthing (esmil) on the Ubuntu Matrix server for providing me with enough guidance to figure out where I had gone wrong above, and got me on my way just a few days after we arrived in Philly.
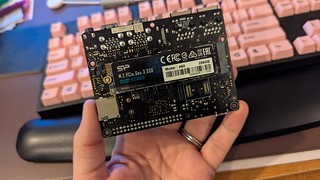
With the newer U-Boot installed, I was able to use the Ubuntu 24.04 livecd image on a micro SD Card to install Ubuntu 24.04 on an NVMe drive! That’s another new change since I last looked at installation, using my little NVMe drive as a target was a lot simpler than it would have been a year ago. In fact, it was rather anticlimactic, hah!
And with that, I was fully logged in to my new system.
elizabeth@r2kt:~$ cat /proc/cpuinfo

processor	: 0

hart		: 2

isa		: rv64imafdc_zicntr_zicsr_zifencei_zihpm_zba_zbb

mmu		: sv39

uarch		: sifive,u74-mc

mvendorid	: 0x489

marchid		: 0x8000000000000007

mimpid		: 0x4210427

hart isa	: rv64imafdc_zicntr_zicsr_zifencei_zihpm_zba_zbb
It has 4 cores, so here’s the full output: vf2-cpus.txt
What will I do with this little single board computer? I don’t know yet. I joked with my husband that I’d “install Debian on it and forget about it like everything else” but I really would like to get past that. I have my little multiarch demo CI project in the wings, and I’ll probably loop it into that.
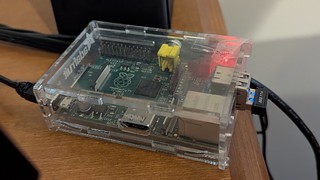
Since we were in Philly, I had a look over at my long-neglected Raspberry Pi 1B that I have here. When we first moved in, I used it as an ssh tunnel to get to this network from California. It was great for that! But now we have a more sophisticated network setup between the houses with a VLAN that connects them, so the ssh tunnel is unnecessary. In fact, my poor Raspberry Pi fell off the WiFi network when we switched to 802.1X just over a year ago and I never got around to getting it back on the network. I connected it to a keyboard and monitor and started some investigation. Honestly, I’m surprised the little guy was still running, but it’s doing fine!
And it had been chugging along running Rasbian based on Debian 9. Well, that’s worth an upgrade. But not just an upgrade, I didn’t want to stress the device and SD card, so I figured flashing it with the latest version of Raspberry Pi OS was the right way to go. It turns out, it’s been a long time since I’ve done a Raspberry Pi install.
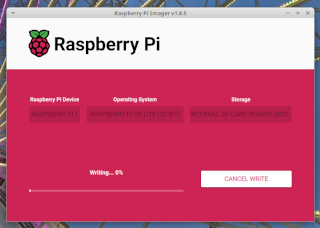
I grabbed the Raspberry Pi Imager and went on my way. It’s really nice. I went with the Raspberry Pi OS Lite install since it’s the RP1, I didn’t want a GUI. The imager asked the usual installation questions, loaded up my SSH key, and I was ready to load it up in my Pi.
The only thing I need to finish sorting out is networking. The old USB WiFi adapter I have it in doesn’t initialize until after it’s booted up, so wpa_supplicant on boot can’t negotiate with the access point. I’ll have to play around with it. And what will I use this for once I do, now that it’s not an SSH tunnel? I’m not sure yet.
I realize this blog post isn’t very deep or technical, but I guess that’s the point. We’ve come a long way in recent years in support for non-x86 architectures, so installation has gotten a lot easier across several of them. If you’re new to playing around with architectures, I’d say it’s a really good time to start. You can hit the ground running with some wins, and then play around as you go with various things you want to help get working. It’s a lot of fun, and the years I spent playing around with Debian on Sparc back in the day definitely laid the groundwork for the job I have at IBM working on mainframes. You never know where a bit of technical curiosity will get you.
