
The Debian Installer lenny release candidate 1 was released on November 12th, which inspired me to check it out and give the installation over ssh a try. Installation over ssh has been supported since the Etch installer, but I embarrassingly have to admit that I didn’t know about it until just recently, and it was just last month that I tried it out for the first time. So this post is more of a “Look, this thing exists and is neat and easy!” than a formal how-to for something tricky.
The screenshots and CD I burned were from Lenny (Testing) which I downloaded here this morning, but this is also supported in Debian Etch in a similar way.
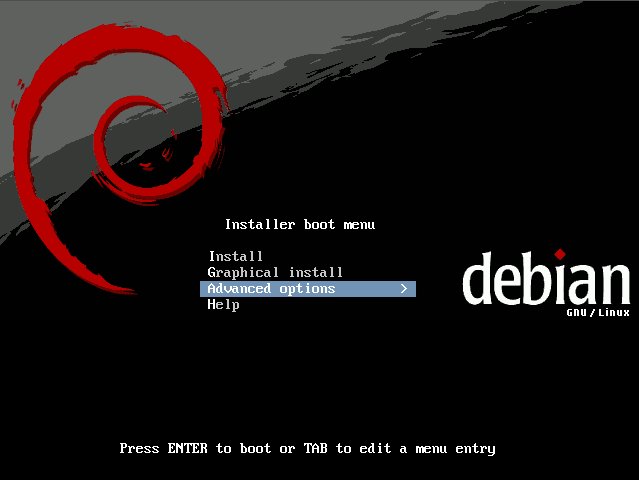
Boot from the CD and in the Installer boot menu select “Advanced options >”
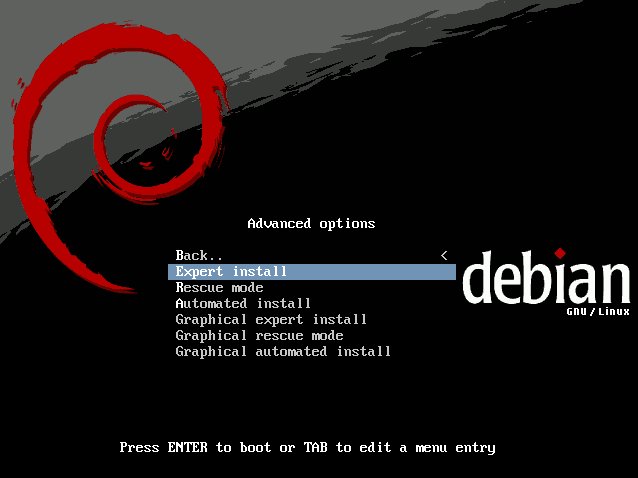
Then select “Expert install”
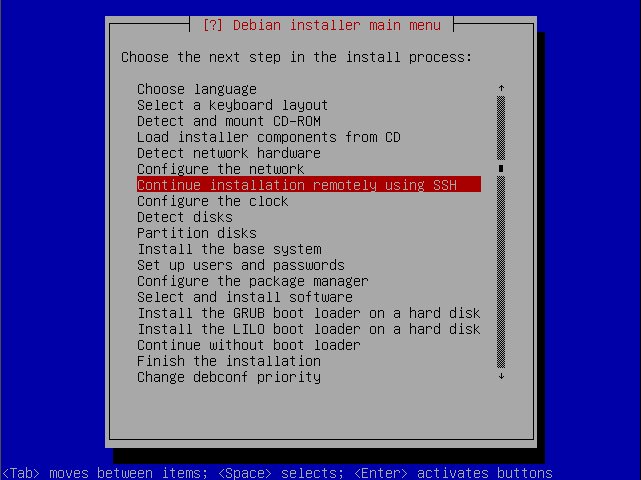
The installer will load up and you will be presented with the Debian installer main menu.
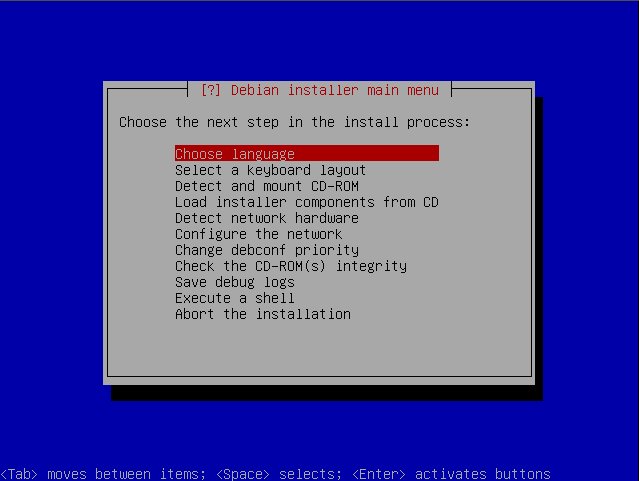
Since the default language and keyboard are fine to get me going (I can reconfigure them later once I get this going over ssh), I skipped these and went straight for “Detect and mount CD-ROM”. When it asked me if I wanted to Start PC card services I selected “No” since I’m not using any PCMCIA cards.
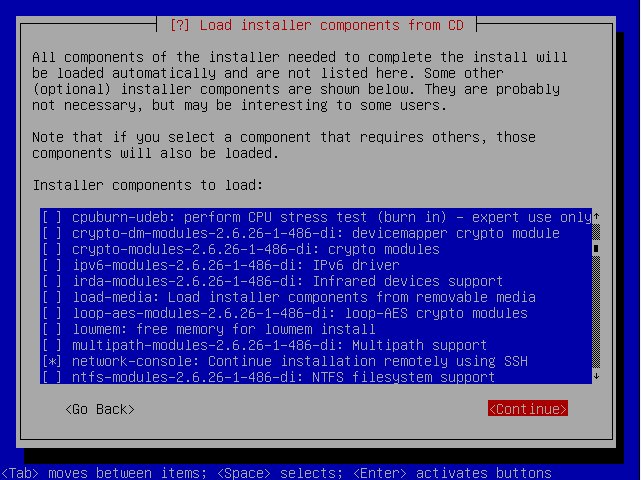
The next option on the menu is “Load installer components from CD”, which you want to select. Browse the list, but for my basic needs the only thing I needed to load up was “network-console: Continue installation remotely using SSH”
Now you’ll need to get networking going. Select “Detect network hardware” and then “Configure the network”.
Next you want to “Continue installation remotely using SSH”
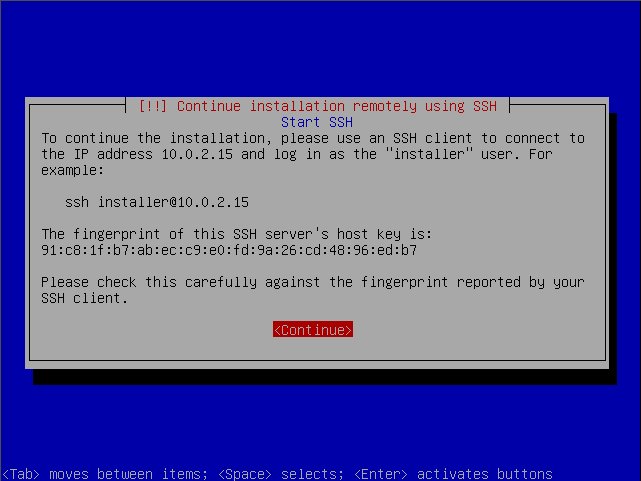
This will generate SSH host keys and have you set a remote installation password. Once it has these set up you will be presented with a screen giving you an installer@ipaddress location for the install and an SSH fingerprint. Use these to ssh into the installer!
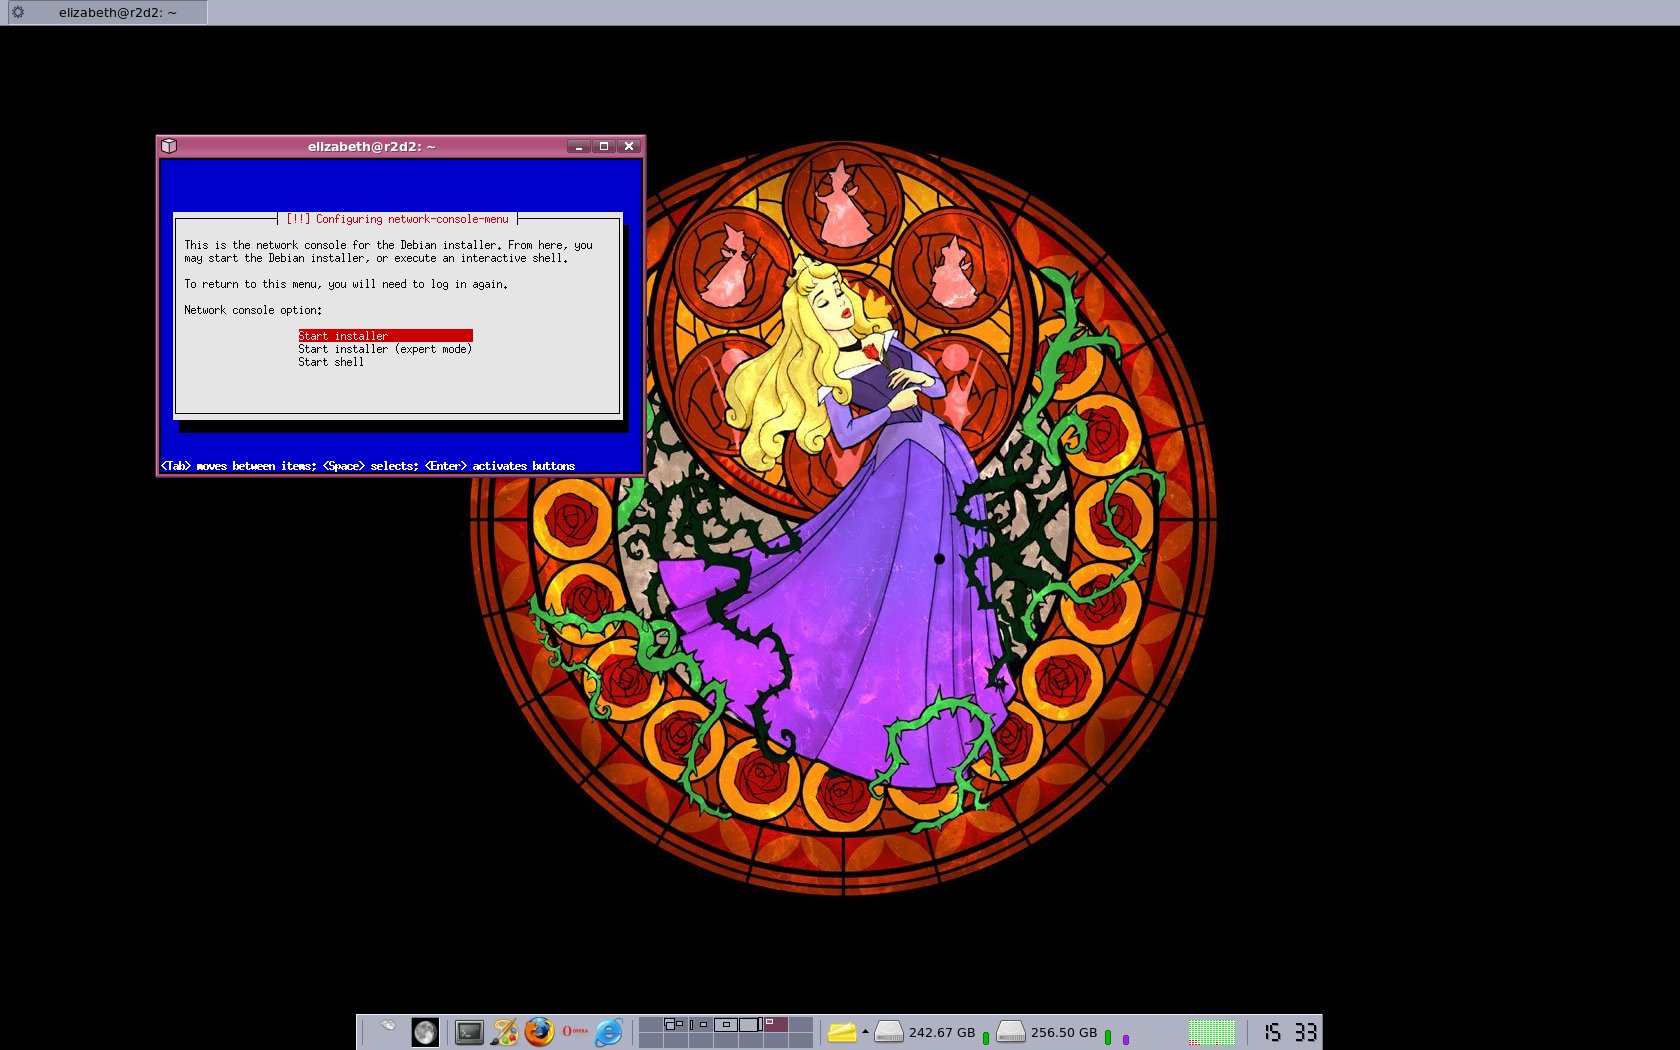
Finally – log in from your remote PC and complete the installation.
I went back and configured keyboard to confirm it was correct and languages so I could add a couple of locales, so don’t forget to do this if you need to change something about your configuration.
Sunday, Nov 16th, 2008 at 19:11
Wow, that is so cool and useful…. thanks for the tip!
Monday, Nov 17th, 2008 at 5:52
good
Monday, Nov 17th, 2008 at 7:11
LOVE IT! This begs the question of what else the installer is capable of.
Friday, Jan 9th, 2009 at 2:48
This would be real interesting if you were able to preconfigure it, so that you didn´t ever need a monitor.
You would just pop in a cd on your target, then look at your router/dhcp server what ip it got, and then log-in.
I´m in the clever situation that I gave away my only monitor in the house you see, because I only use laptops, and now, when I´m soon going to upgrade my servers, I have o drag them down to my LCD-TV to get a freaking monitor during install!!!
:/
Sunday, Mar 1st, 2009 at 3:53
Very nice ty for the tip.
Friday, Jun 19th, 2009 at 15:33
This is a nice howto, but…..
I needed a way to do that on a remote machine.
So I take this howto, setup a “preseed.cfg”, put it with a script taken from another website into the “initrd.gz”
and dang after 2 minutes the remotemachine open ssh and I can finish the setup remotely.
But many thx for this howto.
I read long around the web to finish all. But this was the best I found to make it with ssh.
Best Regards and feel free to give a mail. I will send u the final cut. ;-)
Ruediger Lampe
Friday, Jul 10th, 2009 at 6:33
Hello Ruediger,
Can you please post somewhere your method with preseed.cfg, because i need to do install on remote computer as well.
Regards,
Ivan
Wednesday, Jul 15th, 2009 at 23:36
Here is what I did after searching around a while and some trial and error.
1. Download 5.0.2 netinst cd
wget http://mirrors.kernel.org/debian-cd/5.0.2/i386/iso-cd/debian-502-i386-netinst.iso
2. Mount ISO to folder called iso
mkdir iso
mount -o loop -t iso9660 debian-502-i386-netinst.iso iso
3. Extract to new folder called iso2
mkdir iso2
rsync -a -H –exclude=TRANS.TBL iso/ iso2
4. Changed menu to load SSH on boot
/iso2# nano isolinux/txt.cfg
REMOVE:
remove “menu default” from “label install”
ADD:
label netinstall
menu label ^Network Install Over SSH
menu default
kernel /install.386/vmlinuz
append auto=true vga=normal file=/cdrom/preseed.cfg initrd=/install.386/initrd.gz locale=en_US console-keymaps-at/keymap=us
CHANGE:
“default install” to “default netinstall”
5: Edit both files below and change “timeout 0” to “timeout 5” to make it auto select netinstall
nano isolinux/isolinux.cfg
nano isolinux/prompt.cfg
5. Create preseed.cfg file
nano iso2/preseed.cfg
PASTE BELOW to preseed file:
#### Contents of the preconfiguration file
### Localization
# Locale sets language and country.
d-i debian-installer/locale select en_US
# Keyboard selection.
d-i console-keymaps-at/keymap select us
### Network configuration
# netcfg will choose an interface that has link if possible. This makes it
# skip displaying a list if there is more than one interface.
d-i netcfg/choose_interface select auto
# Any hostname and domain names assigned from dhcp take precedence over
# values set here. However, setting the values still prevents the questions
# from being shown, even if values come from dhcp.
d-i netcfg/get_hostname string newdebian
d-i netcfg/get_domain string local
# Disable that annoying WEP key dialog.
d-i netcfg/wireless_wep string
# The wacky dhcp hostname that some ISPs use as a password of sorts.
#d-i netcfg/dhcp_hostname string radish
d-i preseed/early_command string anna-install network-console
# Setup ssh password
d-i network-console/password password install
d-i network-console/password-again password install
6. Recreate mf5sum.txt file
md5sum `find -follow -type f` > md5sum.txt
7. Create new iso image
mkisofs -o ../custom_install.iso -r -J -no-emul-boot -boot-load-size 4 -boot-info-table -b isolinux/isolinux.bin -c isolinux/boot.cat ../iso2
and your new image is ready to burn. This autoloads everything and does to SSH screen
Hope this helps.