

Back in November I got to type on my first Oliver 9 at a type-in, and I mused about it:
It was lovely and fascinating, and given how much I’ve thought about it since meeting that one, I’m quite certain that one will eventually enter my collection.
In January, one popped up on Facebook Marketplace. I reached out to the seller and learned that it was sadly non-functional, and he had been using it as a decoration in his living room. I didn’t want to drop a couple hundred bucks on one that didn’t work, so I kind of let it go. But I had also shared the listing with MJ to share my excitement in finding one, and he reached out as well and got a few more details, and arranged a time for me to take a look at it in case it was salvagable. That is love.
In preparation for our meeting, I watched a few YouTube videos, including What to look for when buying an Oliver typewriter on The Vintage Type YouTube channel, which would soon become my go-to resource. And then felt relatively confident that I could do a once-over to determine if it was worth it.
I succeeded! We met the owner in the lobby of his apartment building, and while MJ wrangled the kids, I did a quick inspection of key parts, and even popped out the carriage, much to the surprise of the owner, “I didn’t know it did that!” Unfortunately, I didn’t know how to put the carriage back just yet, oops. Fortunately, I determined that it was salvageable but needed some work, so we were able to agree on $200 for it, and then MJ bought it for me.
At home, I learned how to get the carriage on, and the boys and I did a quick once over of it on the dining room table. It was incredibly dusty, and rust had taken over most of the surface. The original green paint is gone from most of it, and there’s only a hint of the stenciled Oliver writing, which is a bit of a shame since it’s really distinctive. As I was looking for the serial number to properly date it, I realized it also doesn’t have the patent plaques on the back. I wonder where those ended up.
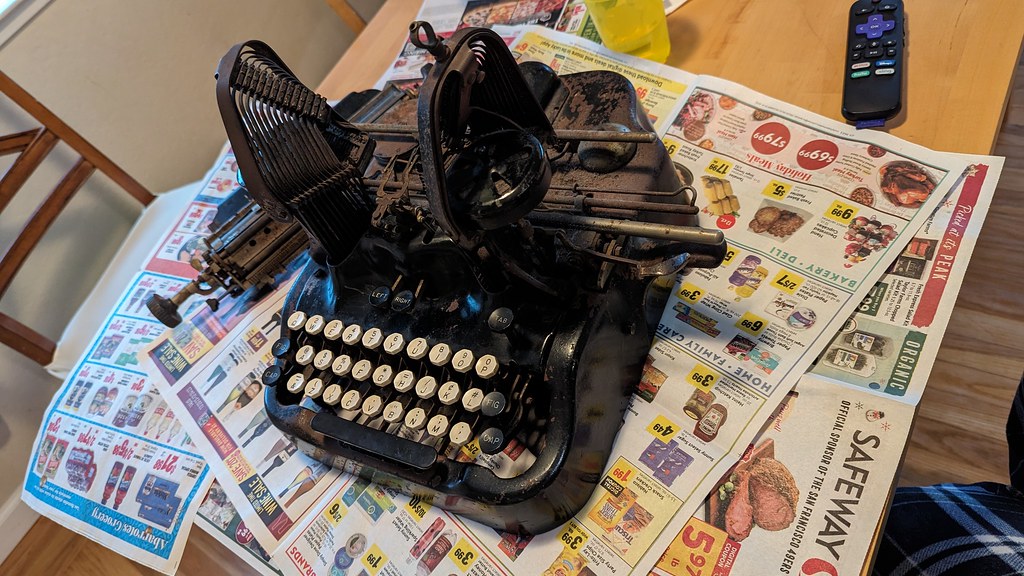
I was quickly able to discover that even though it wasn’t installed, there was a crusty, old ribbon in there, which I found when I removed the spool covers.
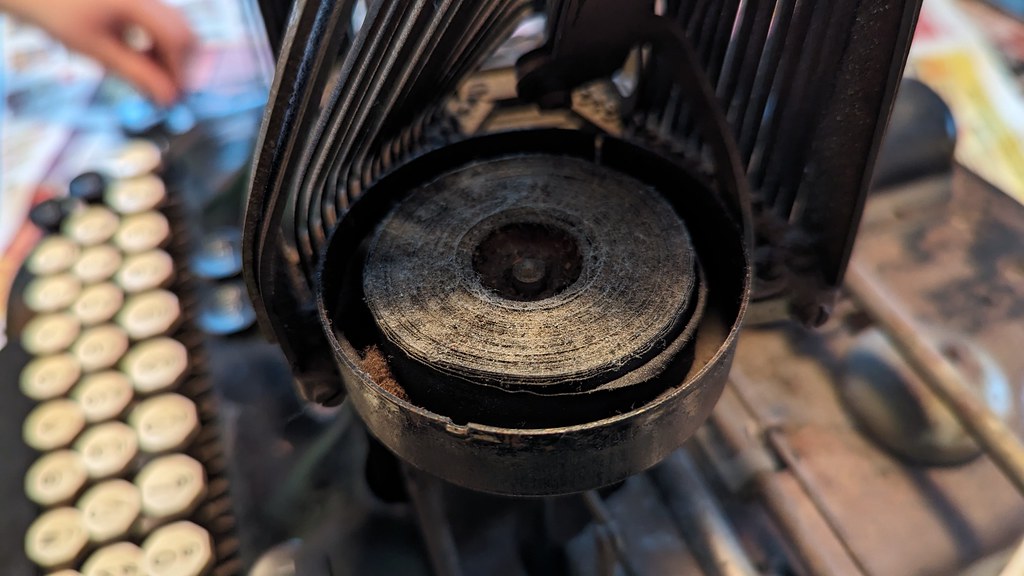
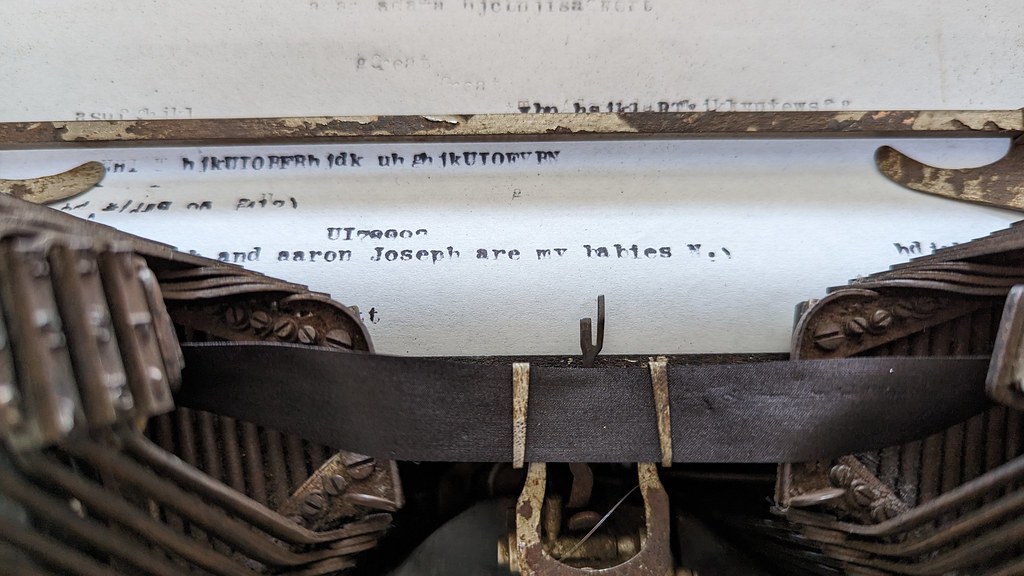
A quick trip back over to The Vintage Type, we watched Installing a New Ribbon on an Oliver typewriter and I was able to glean enough of an understanding of installing the ribbon that I could get this old one installed again. As an aside, I learned later that this video from the same channel is better for me, since I have an Oliver 9 and he shows specifically installing one of those there. Notably, I missed the detail of making sure the ribbon was tucked inside the bottom of the clips to hold it in place, which you can notably see when I finally got to type something, but it worked!
I then ordered some little steel brushes and some Evapo-Rust, so I could really get to work on it. I set up a table in my home office and one evening I got to work removing all the worst of the easily accessible rust.
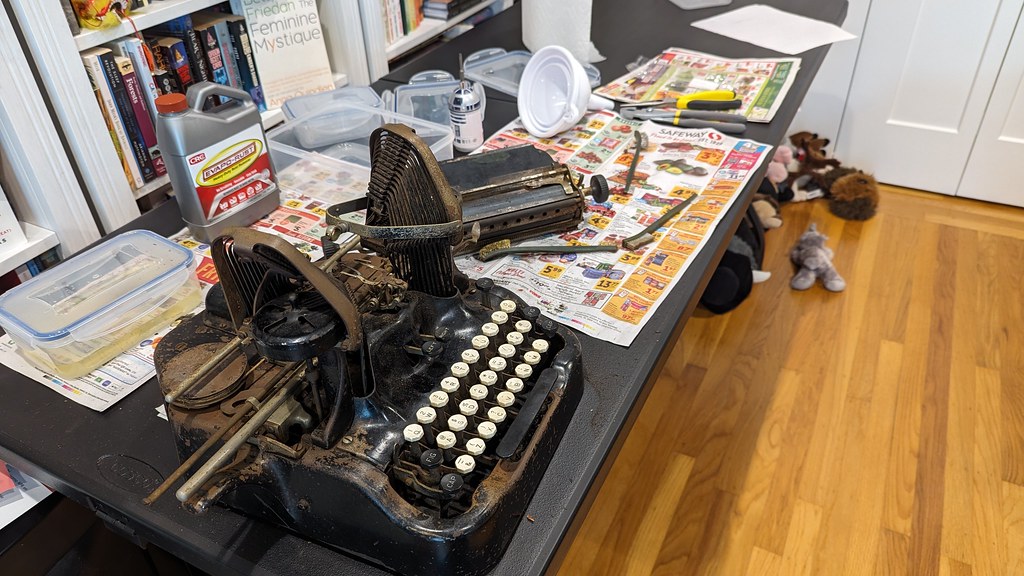
I used Evapo-Rust on the pencil holder arm and the bell, but I’ve held off for now on using it on anything else. It’s a mild remover, but it’s still pretty intense and I didn’t want to mess with any of the remaining green paint. It was at this stage that I found the serial number, which had been encased in rust.
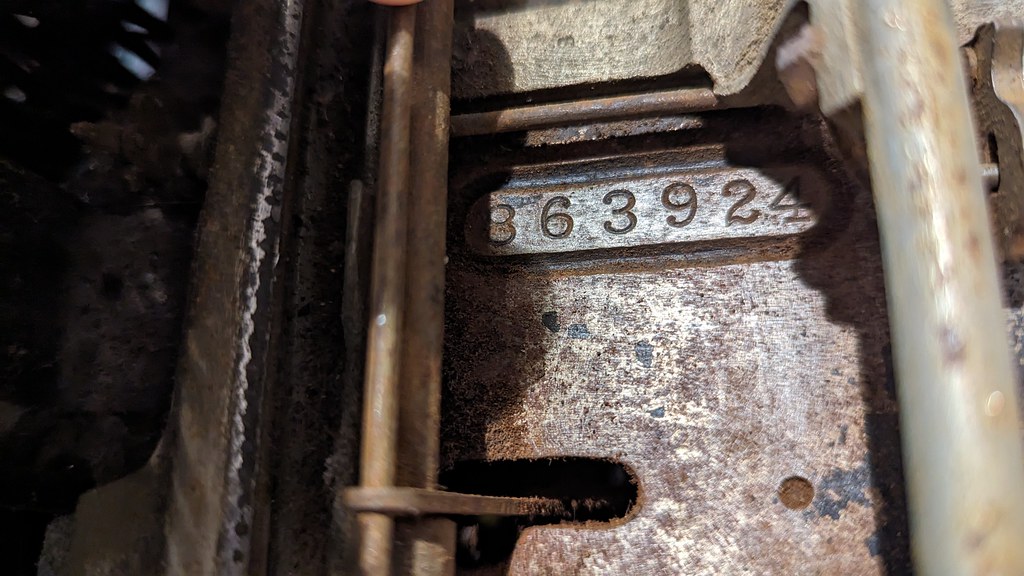
It’s 863924 which means it’s from 1919. The oldest typewriter in my collection!
From there, I brought the typewriter back out to the dining room table so the boys could help me take some soap and water to it to remove all the rust dust and generally get it cleaned up. I will note that the bottom of it seemed to be in pretty good shape with only some minor spots needing attention.

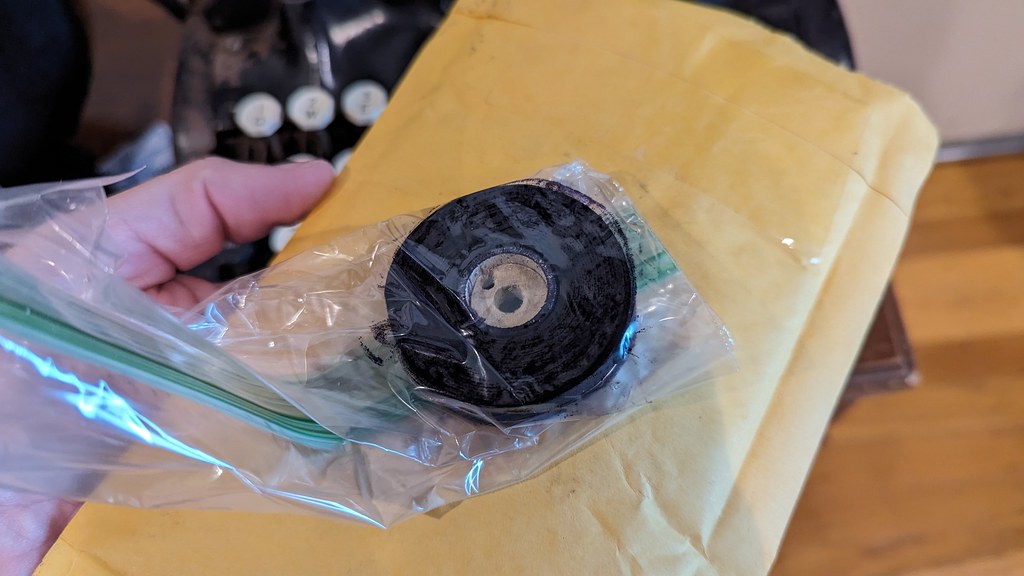
Next up was ordering a ribbon! It was back to our friend at The Vintage Type, since he sells ribbons on eBay. Since I had both my original spools, I could get away with just ordering a single spooled ribbon, and a few days later I had the ribbon in-hand. And then it took me a couple weeks to finally carve out some evening time to install it, because life gets in the way.
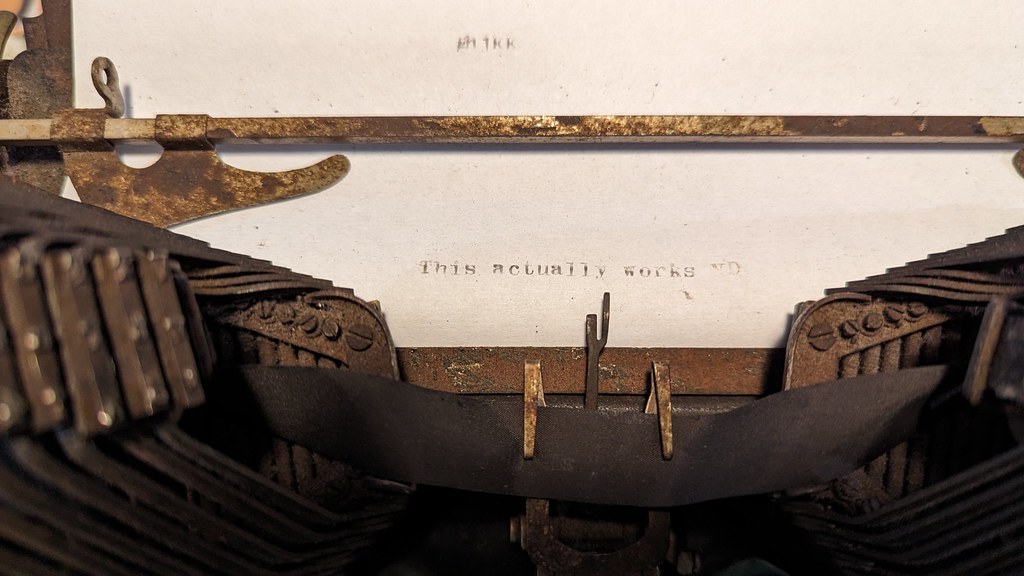
With that, I had a much happier typewriter! But there was one last thing: alignment of letters it was chopping off the bottom of each letter.
Back to a video from The Vintage Type: Adjusting Upper Case Letters and Figures On An Oliver Typewriter. It’s still not perfect, but it’s good enough for now.
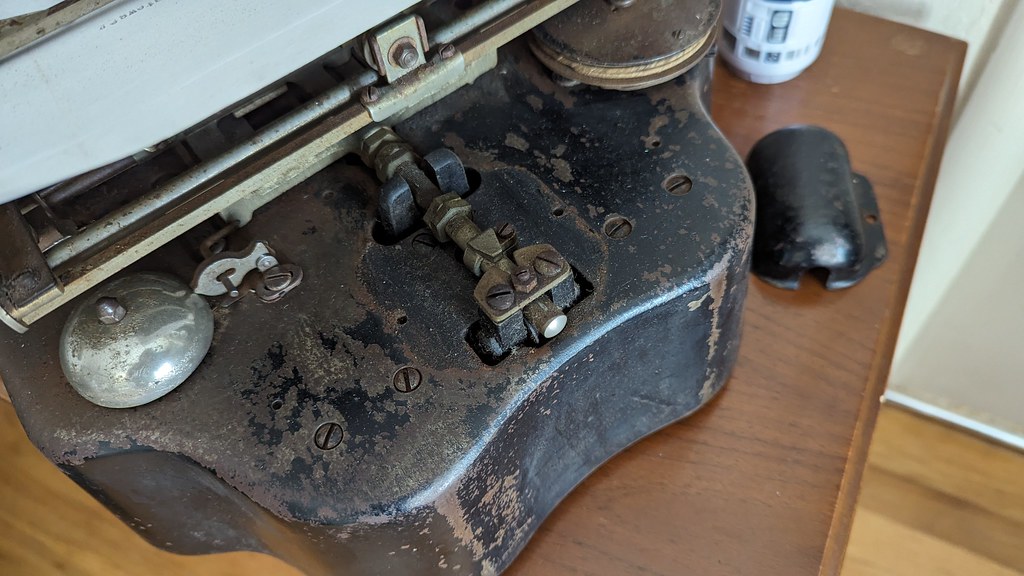
My greatest concern in the long run is that so much of the carriage and other fully exposed parts are functional, but quite rusty. I think addressing this will require a greater extent of dismantling that will cause it to be non-functional while I fix it. It’ll be a tedious project so I make sure I get everything put back together in the right way and kids don’t run off with random screws. I am feeling mixed about whether I want to do this right now. My time is extremely limited and it is working, I kind of want to pause and enjoy it. Plus, it’s over 100 years old, it can probably wait a couple years for a more complete restoration!
For now, it just lives in my home office, happily sitting on a little table where people can see it when I’m on video calls.