

Back in March I wrote The 3D printed Index Typewriter: Part 1 where I covered our experience printing and beginning to assemble the Index Typewriter – AEG Mignon by Keenan Finucan. That blog post basically got to the end of Stage 1: Baseplate Assembly and I got started on Stage 2: Carriage Assembly.
So that’s where I pick things up! Carriage assembly was the easiest part of this whole thing. The only thing that tripped me up were the instructions to insert a wire into some of the long, thin pieces. Insert? Where? Oh! There’s a little hole that spans the whole part! Got it.

Stage 3: Type Arm Components Assembly is where things got interesting again. I had to take some sandpaper to thin a few parts (yes, I could have also just reprinted them a couple percent smaller). The first of which was the Type Arm and I actually broke my first Alignment Wheel because I really tried to wedge it on there, oops.

The other parts I brought sandpaper to were the Pivot Lever Axle and the Actuator Rod.
As I came to the end of assembly, I was testing out the Space and Typing levers and remembered what I had mentioned in my first blog post: “I have a couple springs that won’t quite stay put” with regard to the springs in Stage 1, Step 22. Indeed, in the couple of months this spent getting moved around the house between active work those springs were very gone and I had to replace them. I would not suggest addressing this after you get the Type Arm assembly installed! It’s tricky to get in there, but some patience and a pair of needle nose pliers, I managed to get all three springs replaced.

And with that, assembly was basically complete!
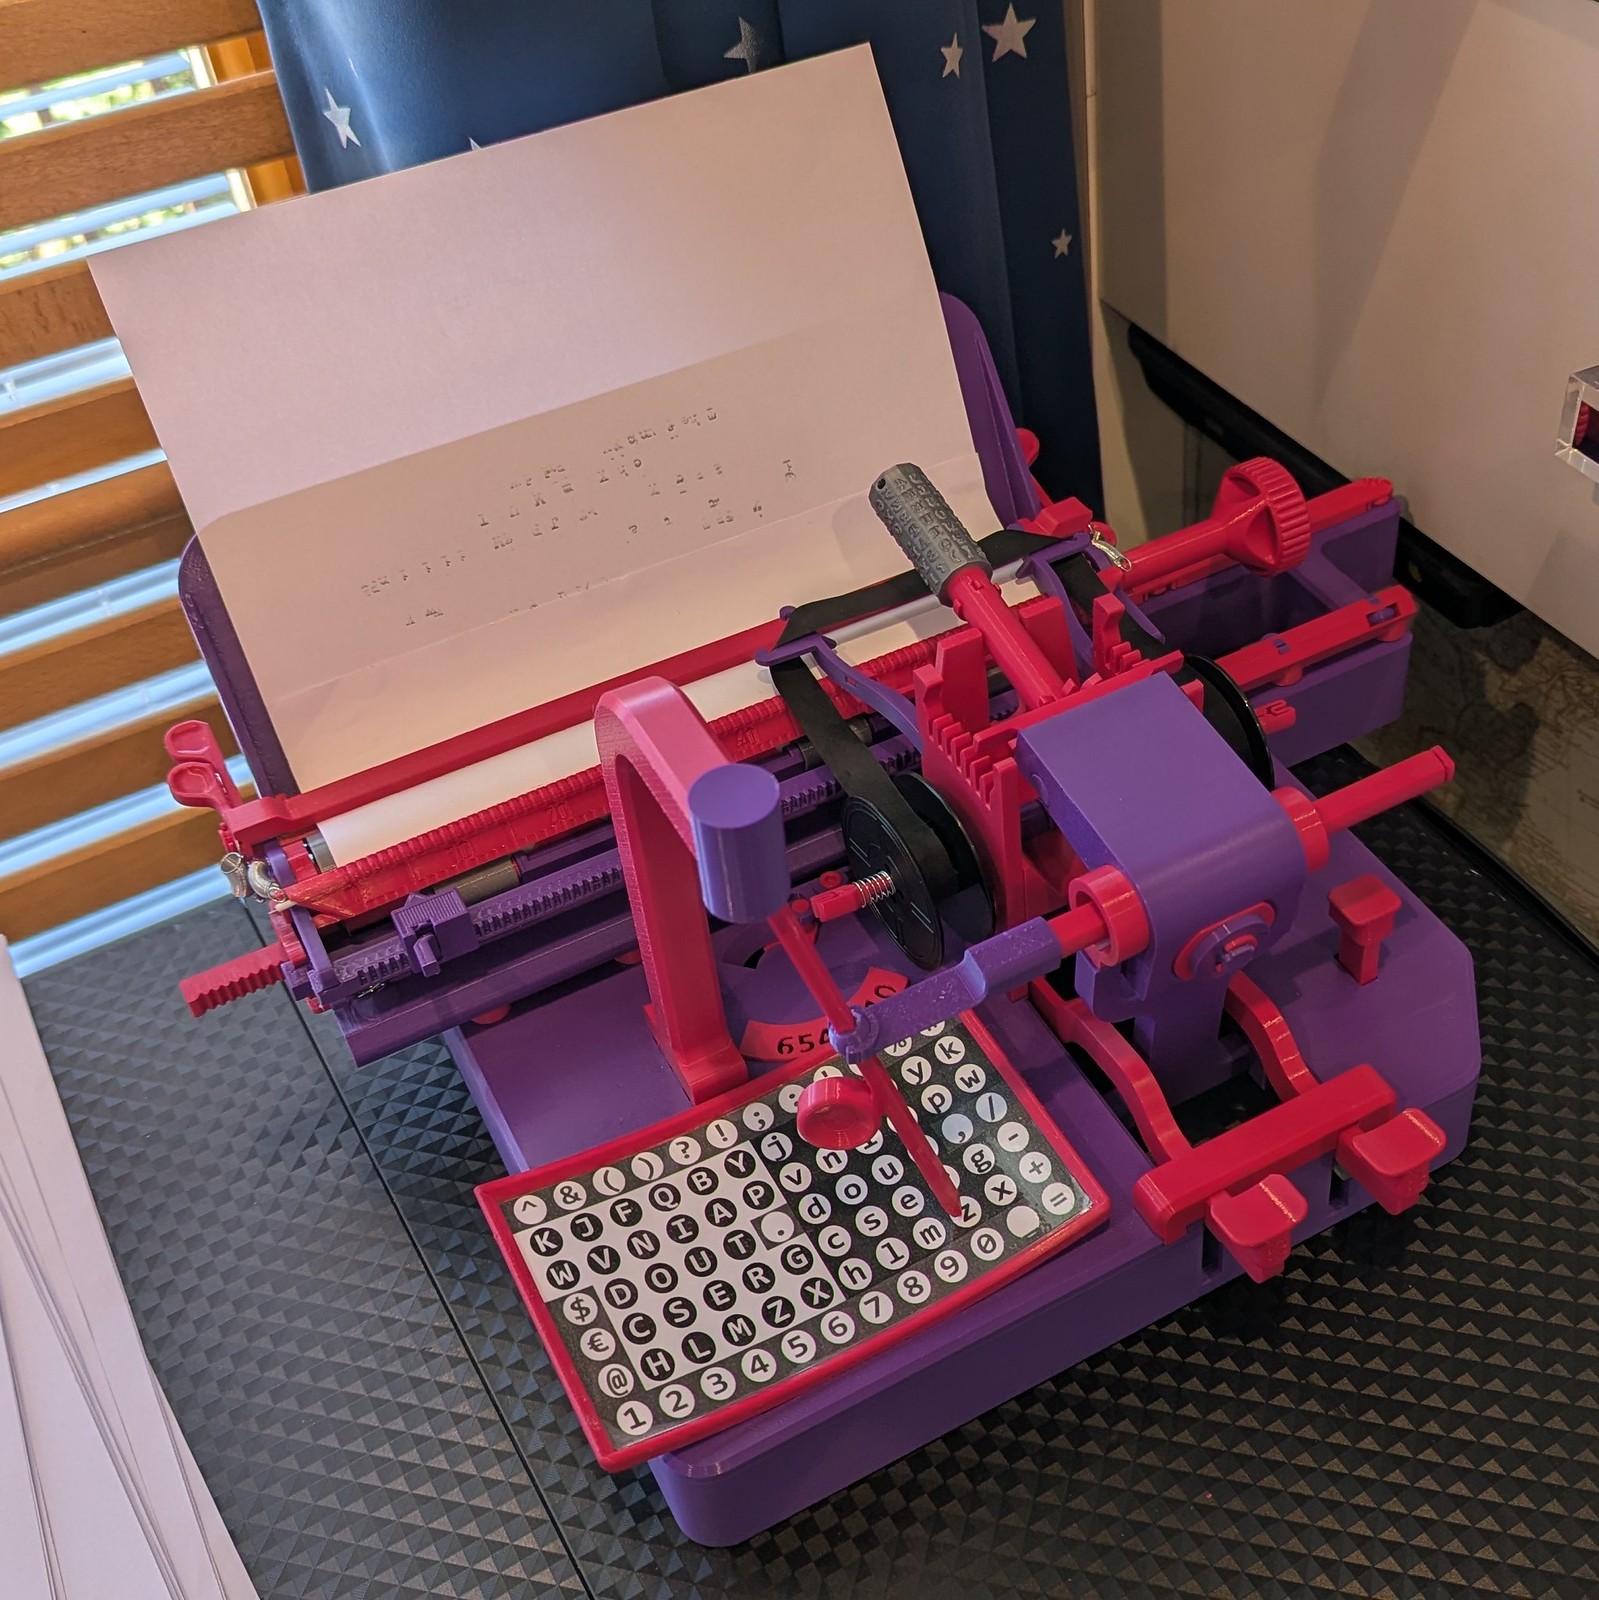
When I shared my photo on Thingverse (here), Keenan noted that I had ribbon threaded slightly wrong (oops), but I fixed that and it now clears the carriage a lot better.
Then I got to work on type alignment with regard to matching up with the Index. This has been tough, but I think I almost got it. I covered a whole paper with characters, but I managed to intentionally type the word “The”! Kind of :)

While trying to figure this out, I also discovered I have to fix a few other things (some of which are covered in the Troubleshooting conclusion to the assembly instructions, hooray!):
Ribbon not advancing: I really struggled with this mechanism during assembly, so I’m not surprised it needs a lot of love.
The stylus meets resistance on the right: When I navigate to the last 2 columns of the index, the stylus gets stuck and I have to gently force it over (and back). Could just be a wheel that’s not quite smooth enough or something, I’ll have to take a closer look.
Backspace does not work: I haven’t even looked at this.
Once these are sorted, I’ll have to see how general carriage advancement is working, since it’s been somewhat inconsistent as I’m testing my typing.
But I wanted to publish this blog post because we’re traveling over the summer and it’s going to be a couple months before I can finish this, I don’t want to forget anything and wanted to record my status so I’m ready to tackle the issues when I get back.
I hope you’ve enjoyed the journey thus far, I have!