From Oct 22-23rd I had the pleasure of speaking at and attending All Things Open in Raleigh, North Carolina. Of all the conferences I’ve attended this year, this conference is one of the most amazing when it comes to how well they treated their speakers. When I submitted my talk I received an email from the conference organizer thanking me for the submission. Frequent emails were sent keeping us informed about all the speaker-focused conference details. Leading up to the event I woke up one morning to this flattering profile on their news feed. A series of interviews was also published by the OpenSource.com folks featuring speakers. Once there, I was thanked about 100 times throughout the 2 day event. In short, they really did a remarkable job making me feel valued.

Thankfulness aside, the conference was top notch. Several months back I read The foundation for an open source city by Jason Hibbets so I was excited to go to Raleigh (where much of the work Hibbets talked about centered around) and doubly amused when Jason said hello to me and I got to say “hey, I read your book!” During the conference introduction they said the attendence last year (their first year) was around 700 and that they were looking at 1,100 this year. The conference was opened by Raleigh Mayor Nancy McFarlane, which was pretty exciting, I’d seen cities send CTOs or supervisors, but the having the mayor herself show up was quite the showing of support.
After her keynote came Jeffrey Hammond, VP & Principal Analyst at Forrester Research. I really enjoyed the statistics his company put together regarding the amount of open source software being used today. For instance, of developers surveyed they learned that 4/5 of them are using open source software and 73% of them are programming outside of their paid job, 27% on open source.
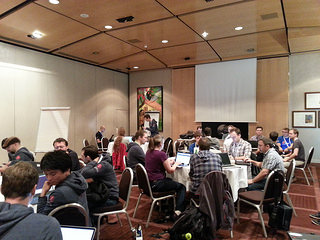
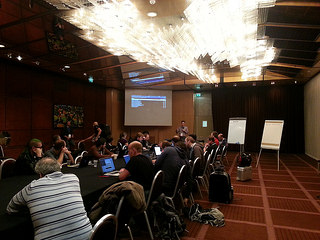
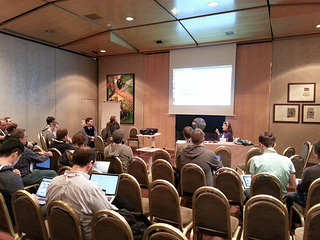
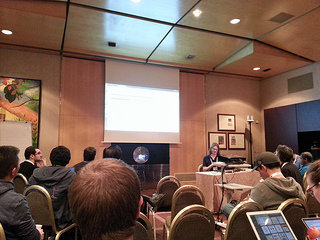
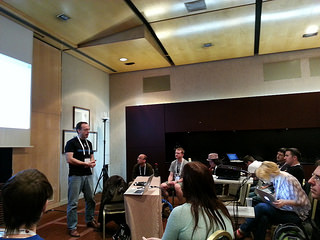
Right after the keynotes I headed downstairs to give my talk, Open Source Systems Administration. A blending of my passion for open source and love of systems administration, this is one of my favorite talks to give, I really enjoy being able to present on how the OpenStack infrastructure itself is an open source project. It was a lot of fun chatting with people throughout the rest of the conference who had attended (or missed) my talk, while there is less surprise these days that a project would open source an infrastructure, there’s a lot of interest in learning that there are project which actually have and how we’ve done it. Slides from my talk here: ATO-opensource_sysadmin.pdf (2.3M).
 Giving my talk! Thanks to Charlie Reisinger for this photo.
The schedule made it hard to select talks, but I next decided to head over to the Design track to learn from Garth Braithwaite why Open Source Needs Design. I’ll start off by saying that it’s wonderful that there are some designers participating in open source these days, but as Garth points out in his talk they are generally: paid by a company as a designer to focus on the product (open sourceyness of it doesn’t matter, it’s a job), a designer friend of someone in the project who is helping out or a developer on the project who happens to have some design expertise (or is willing to get some in order to help the project). He explored some of the history of how developers made their way to open source and the tools we used, and explained that the “story” doesn’t exist for designers, why would they get involved? They’re not fixing a printer or solving some tricky problem. The tools for open collaboration for designers also don’t really exist, popular sites for design sharing like Dribbble don’t have source upload options and portfolio sites like BeHance lack any ability for collaboration. The new DesignOpen.org seeks to help change that, so it was interesting to learn about that. From there he detailed different types of design work, UX, IxD and UI and the tools and deliverables for each type of work. As someone who really has never worked with design it was an interesting tour of that space. His slides from the talk are available here: speakerdeck.com/garthdb/open-source-needs-design (first few slides are a image-full, but stick with it, some great slides with bullet points come later!).

Then it was off to see Lessons Learned with Distributed Systems at bit.ly presented by Sean O’Connor (it was a pleasure to meet him and colleague Peter Herndon during the keynote earlier in the day). The talk centered around some of the concerns when architecting systems at scale, from time syncronization to having codebases that are debuggable. At bit.ly they adopted a codebase that is broken out into many small pieces, allowing ops to dig into and learn about specific components when something goes wrong, not necessarily having to learn everything all at once in order to do their job effectively. He also went into how they’ve broken their workload up into what has to be done synchronously and what can be shifted into an asynchronous job, which is preferred because it’s easier to do well. Finally, he talked some about how they deal with failure, starting off with actually having a plan for failure, and doing things like back offs, where the retries end up spaced out over time rather than hammering the service constantly until it has returned.
After lunch I decided to check out the Messaging Standards and Systems – AMQP & RabbitMQ talk by Gavin M. Roy. I’ve used RabbitMQ a fair amount, but that doesn’t mean I’ve ever paid attention to AMQP (Advanced Message Queuing Protocol), I was pretty surprised to learn that releases 0-8 and 0-9-1 are very different the 1.0 release and are effectively overseen by different people, with many users still intentionally on 0-9-1. Good to know, I imagine that causes a ridiculous amount of confusion. He went through some of the architecture of how RabbitMQ can be used and things it does to “fix” issues encountered with the default AMQP 0-9-1. Slides from his talk here speakerdeck.com/gmr/messaging-standards-and-systems-amqp-and-rabbitmq (the exchange slides about halfway through are quite helpful).
I was then off to Saving the World with Open Source and Science presented by Dr. Marcus Hanwell. Given my job working on OpenStack, I perhaps have the distinct benefit of being exposed to scientists who understand how to store, process and present big data, plus who understand open source. I assumed this ubiquitous, so this talk was quite the wake up call. Not only are publicly-funded papers not available for free (perhaps a whole different rant), the papers often don’t have enough data for the results to be reproducible. Sources from which data was processed aren’t released (whether it be raw data, source code used to make computations or, seriously, an Excel spreadsheet with some data+formulas), images are shrunk and stripped of all metadata so it can be impossible to determine whether you’re actually seeing the same thing. Worse, most institutions have no way to index this source material at all, so something as simple as a harddrive failure on a laptop can mean loss of this precious data. Wow, how depressing. But the talk was actually a call for action in this space. As technologists there are things we can do to provide solutions to scientists, and scientists working in research can make social changes so that releasing full sources, code and more becomes something valued and validation of results is something that once again becomes central to all scientific research.
Day one completed with a keynote by Doug Cutting he titled “Pax Data” which was a fascinating look into the world we’re building where the collection of data is What We Do. He began by talking about how in most science fiction the collectors of data end up being the Bad Guys in a future dystopia, but the fact is that sectors from Education to Healthcare to Climate can benefit from the collection and analysis of big data. He posted the question to the audience: How do we do this without becoming those Bad Guys? He admitted not having a full answer, but provided some guidance on key things that would be required, including transparency, best practices around data handling, definition of data usage abuse so we can protect against it, and either government or industry oversight and/or regulation. Fascinating talk for me, particularly as I was in the middle of reading both a SciFi dystopia book where big data becomes really scary (The Circle by David Eggers) and non-fiction book about our overuse of technology (Program or be Programmed).
Day 2! Keynotes began with a talk by James Pearce of Facebook. I know Facebook is pretty much built on open source (just like everyone else) but this talk was about the open source program he and his team have built within Facebook starting about a year ago. As is standard for many companies starting with open source, they’d just “throw things over the wall” and expect the code to be useful to the community. It wasn’t. So they then began seriously working to develop the code the were open sourcing, assigning people internally to be the caretakers of projects, judging the health of projects based on metrics like forks and commits from community members outside of Facebook. They also run much of the same code versions internally as they release in the community. Github profile for Facebook is here: https://github.com/facebook. Very nice work!
The next keynote was by DeLisa Alexander of Red Hat on Women in Open Source. She started out with a history lesson about how the first real programmers were women and stressed why diversity is important in our industry. Stories about how the most successful women in open source have had encouragement of some form from their peers, and how important it is that everyone in the audience seek to do that with newcomers to their community, particularly women. It was also interesting to hear her talk about how children now often think of computers as opaque black boxes that they can’t influence, so it’s important to engage children (including girls) at a young age to teach them that they can make changes to the software and platforms they use.
Alexander also hosted a panel at lunch which I participated in on this topic. I was really honored to be a part of the panel, it was packed with very successful women in tech and open source. Jen Wike Huger wrote up some of her notes in a great article here: Keys to diversity in tech are more simple than you think. My own biggest takeaway from the panel was the realization that everyone on the panel has spent a significant amount of time being a mentor in some formal capacity. We’ve all supported students and other women in technology via organizations that we either work or volunteer for, or run ourselves.
Getting back to sessions, I went to Steven Vaughan-Nichols’ talk on Open Source, Marketing, and Using the Press. Now, technically I’m the Marketing Lead for Xubuntu, but I somewhat joke to people that it’s “only because I know how to use Twitter.” Amusingly, during his talk he covered people just like myself, project contributors who end up with the Marketing role. I gained a number of great insights from this talk, including defining your marketing audience properly – there’s your community and then there’s the rest of the world. Tips to knowing your customer, maybe we should do a more formal survey in Xubuntu about some of the decisions we make rather than relying upon sporadic social media feedback and expecting users to participate in development discussions? He also drove home the importance of branding, which thanks to our logo designer Pasi Lallinaho I believe we have done a good job of. There was also a crash course in communicating with the press: know who you’re contacting and what their focus is, be clear and concise in emails and explain the context in which your news is exciting. Oh, and be friendly and reply promptly when reporters contact you. I also realized I should add our press contact to our website, that’s a good idea! I have some updates to make to the Xubuntu Marketing blueprint this cycle.

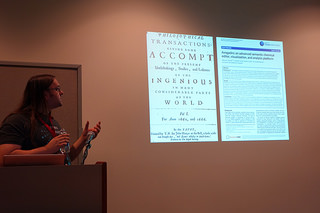
Perhaps one of my favorite talks of the even was presented by Dr. Megan Squire: Case Study: We’re Watching You: How and Why Researchers Study Open Source And What We’ve Found So Far. I think what I found most interesting is that while I see poll from time to time put out by people claiming to do research on open source, I never see the results of that research. Using what I now know from Dr. Marcus Hanwell (many academic papers are locked behind journal pay walls) this suddenly makes sense. But Dr. Squire’s talk dove into the other side of research that doesn’t include polls: research done on data, or “artifacts” that open source projects create. Artifacts are pretty much anything that is public as a result of a project existing, from obvious things like code to the public communication methods we use like IRC and mailing lists. This is what is at the heart of a duo of websites she runs, the first being FLOSSmole which connects well-formatted data about projects with researches interested in doing datamining against it, and FLOSShub which is a collection of papers she’s collected about open source so it’s all in one place and we can see what kind of research is being done. Aside from her great presentation style, I think what made this one of my favorites was the fact that I didn’t know this was happening. I make FOSS artifacts all day long, both in my day job and with my open source hobbies, and sure I know it’s out there for anyone to find, piles of IRC logs, code reviews, emails, but learning that academics are actively processing them is another thing entirely. For instance, to take an example from a project I work on, I had no idea this existed: Estimating Development Effort in Free/Open Source Software Projects by Mining Software Repositories: A Case Study of OpenStack. It made me a bit tin-foil-hat for about 5 minutes until I once again realized that I’m not just fine, but happy to be putting my work out there. Huge thanks to her for doing this presentation and maintaining these really valuable websites.

Slides from her presentation are up on Google docs here and are well worth the browse for examples she uses to illustrate how our artifacts are being used in research.
After lunch I attended my last three talks for the conference, the first one being Software Development as a Civic Service presented by Ben Balter. I’ve attended a number of civic hacking focused talks at events over the past couple years, but this one wasn’t strictly talking about a specific project or organization in this space. Instead he focused on the challenges that confront governments and us as technologists as we attempt to enter the government space, and led to one of my favorite (sad!) slides of the event, in which you will note that doing anything remotely modern (use of public package repositories, configuration management or source control) doesn’t factor in:

He talked about how some government organizations are simply blinded by proprietary sales talk and FUD around open source, while others actually are bound by specific governmental requirements in the software that industries have figured out, but open source projects don’t think to include (ie – an Open Source CMS may get us 99% of us there, but this company is offering something that satisfies everything because it’s their job to do so). He also talked some about the “Command and Control” structure inside of government and how transparency can often be seen as a liability rather than the strength that we’ve come to trust in within the open source community. He wrapped up with some success stories from the government, like petitions.whitehouse.gov and GOV.UK and shared some stats about the increase of known government employees collaborating on Github.
The next talk was by Phil Shapiro on Open Sourcing the Public Library. To begin his talk he talked about how open source has a major opportunity as libraries move from the analog to digital space. He then moved into a fact he wanted to stress: libraries are owned by all of us. There is an effort to transform them from the community “reading room” into the community “living room” where people share ideas and collaborate on projects, bringing in more educational resources in the form of classes and the building of maker spaces. I love this idea, I find Hackerspaces to be unintentionally hostile places for many young women, so providing a different option to accomplish similar goals is appealing to me. I think what struck me most about this was how “open sourcey” it felt, people coming together to build something new together in the open in their community, it’s why I work on any of this at all. He shared a link of some collected writings about the future of Libraries here: https://sites.google.com/site/librarywritings/

The final talk of the day I attended was Your Company Culture is Awesome (But is Company Culture a Lie?) by Pamela Vickers. In her talk she identified the trend in technology of offering “perks” in lieu of an actual healthy work environment for workers. These perks often end up masking real underlying unhappiness for employees, and ultimately lead to loss of talent. She suggested that companies take a step back from their pile of perks and look to make sure they’re actually meeting the core needs of their employees. Are your developers happy? How do you know? Are you asking them? You should, and your employees should trust you to be honest with you and to at least professionally acknowledge their feedback. She also highlighted some of the key places where companies fall down on making their developers happy, including forcing them to use the wrong tools, upsetting a healthy work-life balance, giving them too much work or projects that don’t feel achievable and giving them boring or unimportant projects.
To wrap this up, huge thanks to everyone who worked on and participated in this conference. As a conference sponsor, my employer (HP) had a booth, but unfortunately I was the only one who was able to attend. I spent breaks and lunches at the booth (leaving a friendly note when I was away) and had some great chats with folks looking for Python jobs and who were more generally interested in the work we’re doing in the open source space. It still can strike people as unusual that HP is so committed to open source, so it’s nice to be available to not only give numbers, but be a living, breathing example of someone HP pays to contribute to open source.


